 Powered by Bioz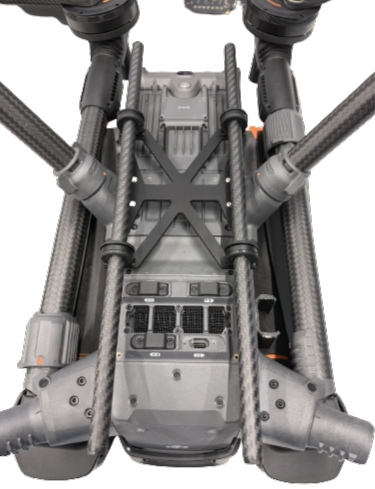
1Overview
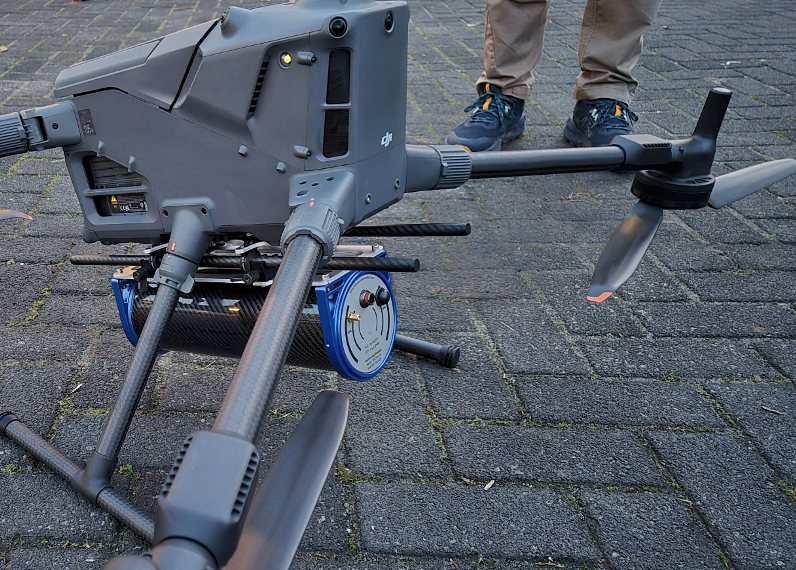
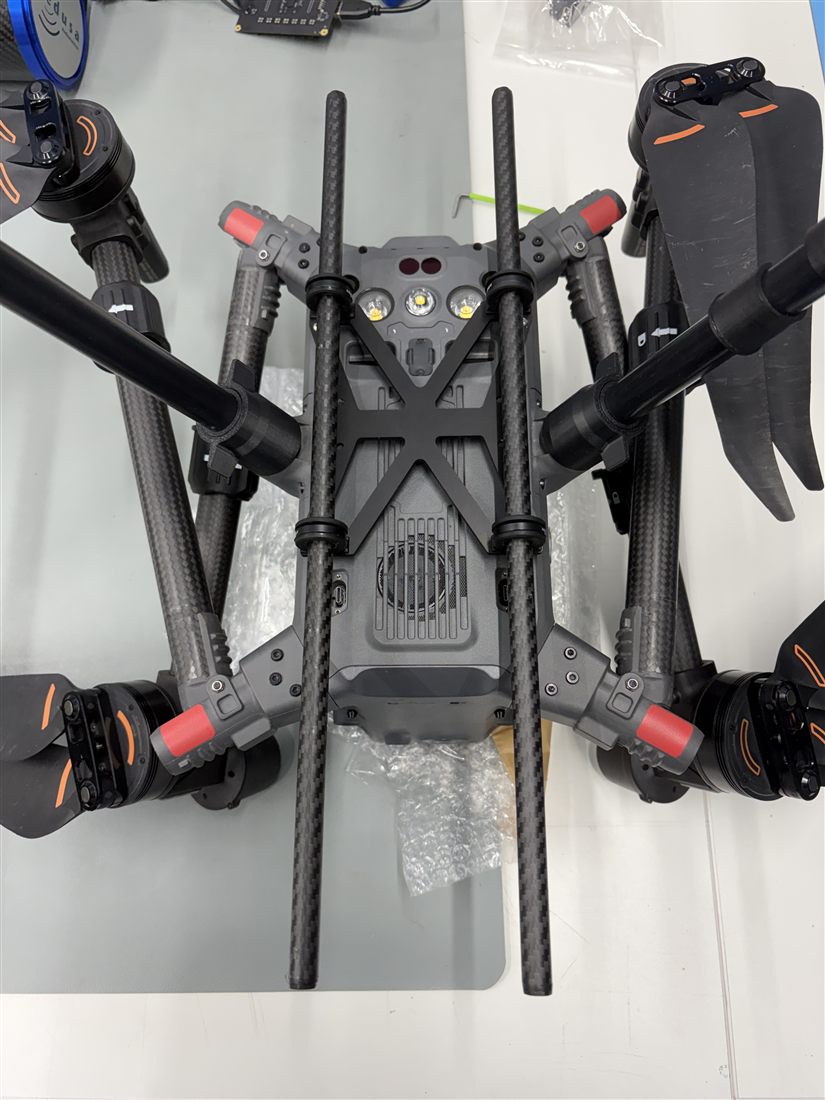
The MSB-303 Universal Mounting Plate is Medusa's current mounting system for the MS-Series drone-borne gamma spectrometers. It is a modular, two-part quick-release plate: a drone-side plate (Part A) that mounts to the carrier, and a sensor-side plate (Part B) sized to the specific detector, joined by a twist-lock carbon-fiber-tube interface.
One MSB-303 kit, with the correct Part B for the detector in use, replaces the model-specific plates Medusa previously offered per detector (see Section 7).
Features
- One mounting system across the MS-350, MS-700, and MS-1000
- Quick-release, twist-and-press coupling for fast attach/detach
- Rubber-damped carbon-fiber-tube interface for vibration resistance
- Reference-fit to the DJI Matrice 350 and Matrice 400, adaptable to other carrier platforms
This page is Berkeley Nucleonics' summary of Medusa's official MSB-303 assembly instructions, adapted to our documentation format. For the complete, most current procedure and reference drawings, always follow Medusa's official assembly instructions.
2Compatibility
The MSB-303 is compatible with the following Medusa MS-Series detectors carried by Berkeley Nucleonics:
| Detector | Datasheet |
|---|---|
| MS-350 | MS Series overview → |
| MS-700 | MS Series overview → |
| MS-1000 | MS Series overview → |
Reference drone platforms are the DJI Matrice 350 and DJI Matrice 400. Per Medusa, the system is not limited to these two — any drone or carrier platform capable of supporting the payload and offering a suitable mounting interface can be used, with possible additional integration work.
3Parts & Components
The MSB-303 kit has two main assemblies:
- Part A — Drone plate: aluminum plate with integrated carbon-fiber rods; mounts to the drone or carrier.
- Part B — Sensor plate: aluminum plate sized to the detector; mounts directly to the MS-Series unit.
| Component | Weight |
|---|---|
| Part A — drone plate | 126 g |
| Part B — sensor plate, for MS-350 | 168 g |
| Part B — sensor plate, for MS-700 | 176 g |
| Part B — sensor plate, for MS-1000 | 202 g |
Materials: aluminum plates, carbon-fiber tubes, rubber vibration dampers, stainless-steel fasteners (M3 and M4).
Fasteners referenced: M3×25, M3×16, M3×8, and M4×20 screws, plus M3 standoffs/spacers and M4 lock nuts, depending on drone platform and detector. Reference drawings (PDF/DXF) are available from Medusa on request.
4Drone-Plate Installation
General
- Attach Part A to the drone using existing mounting holes, or a custom adapter if needed.
- Confirm the mounting surface is rigid and flat before proceeding.
- Insert the carbon-fiber tubes into the rubber dampers with a twisting motion until seated.
- Check that both tubes protrude equally on each side.
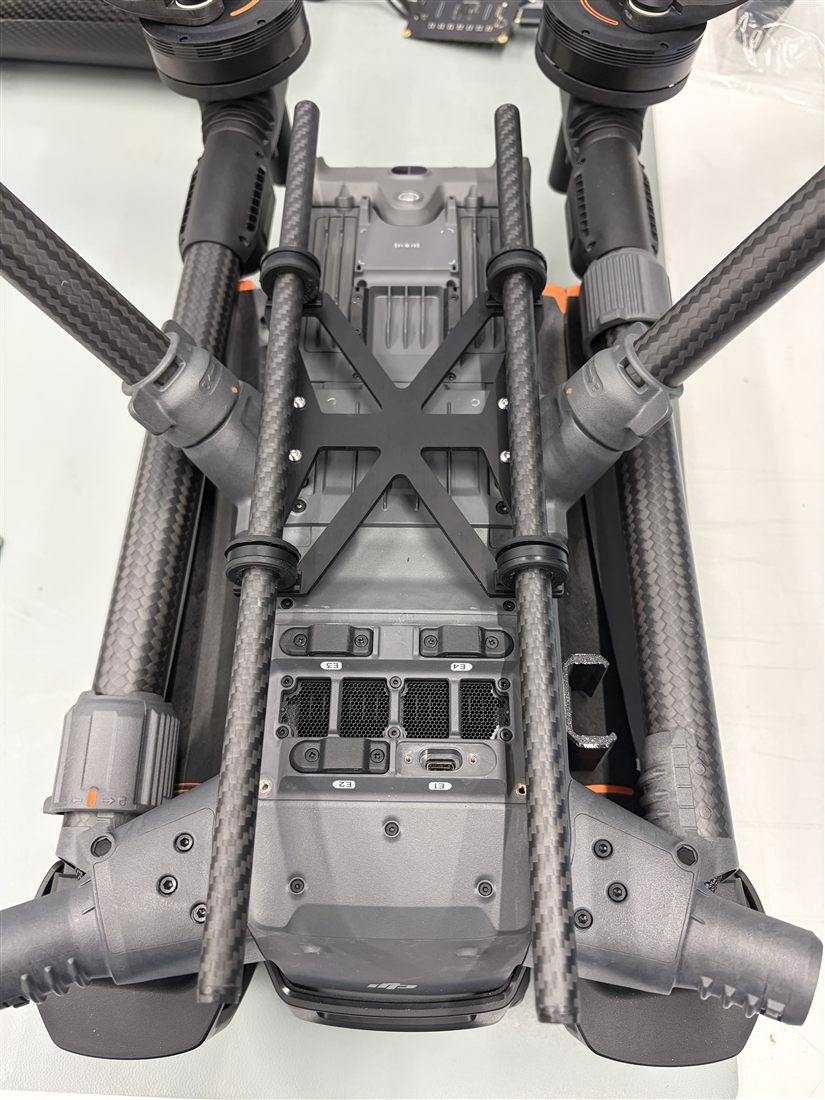
DJI Matrice 400
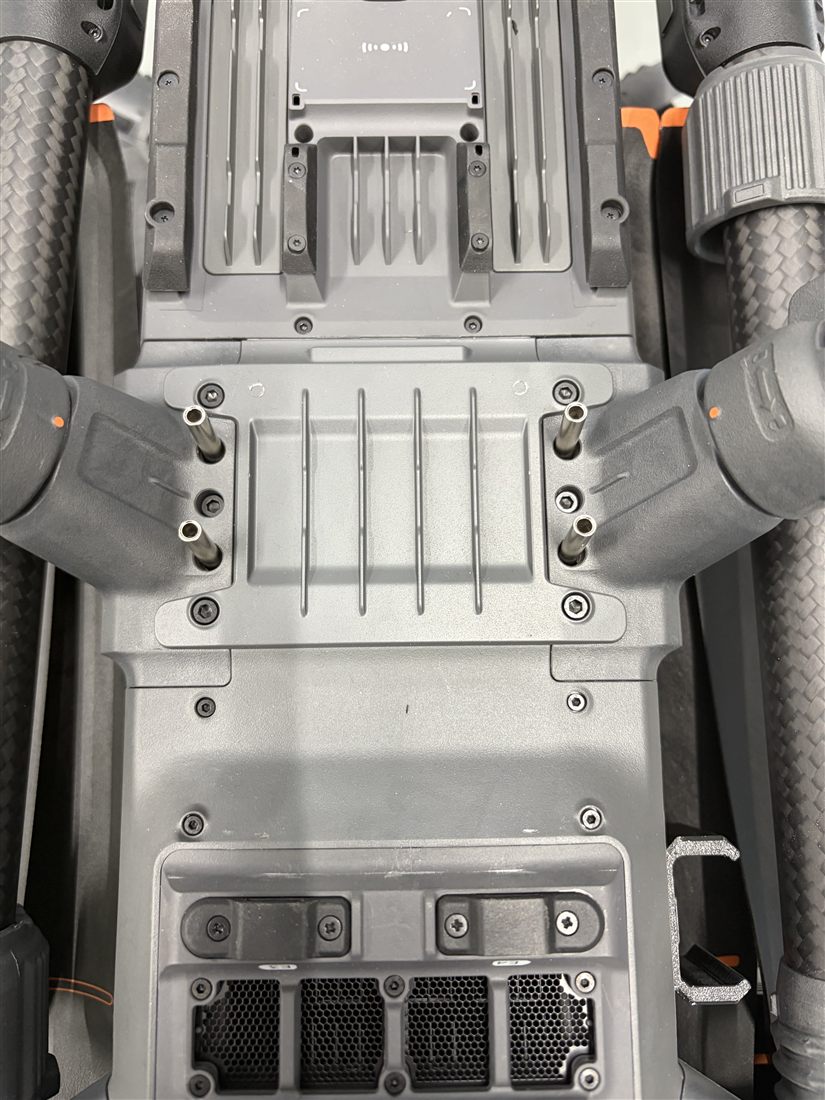
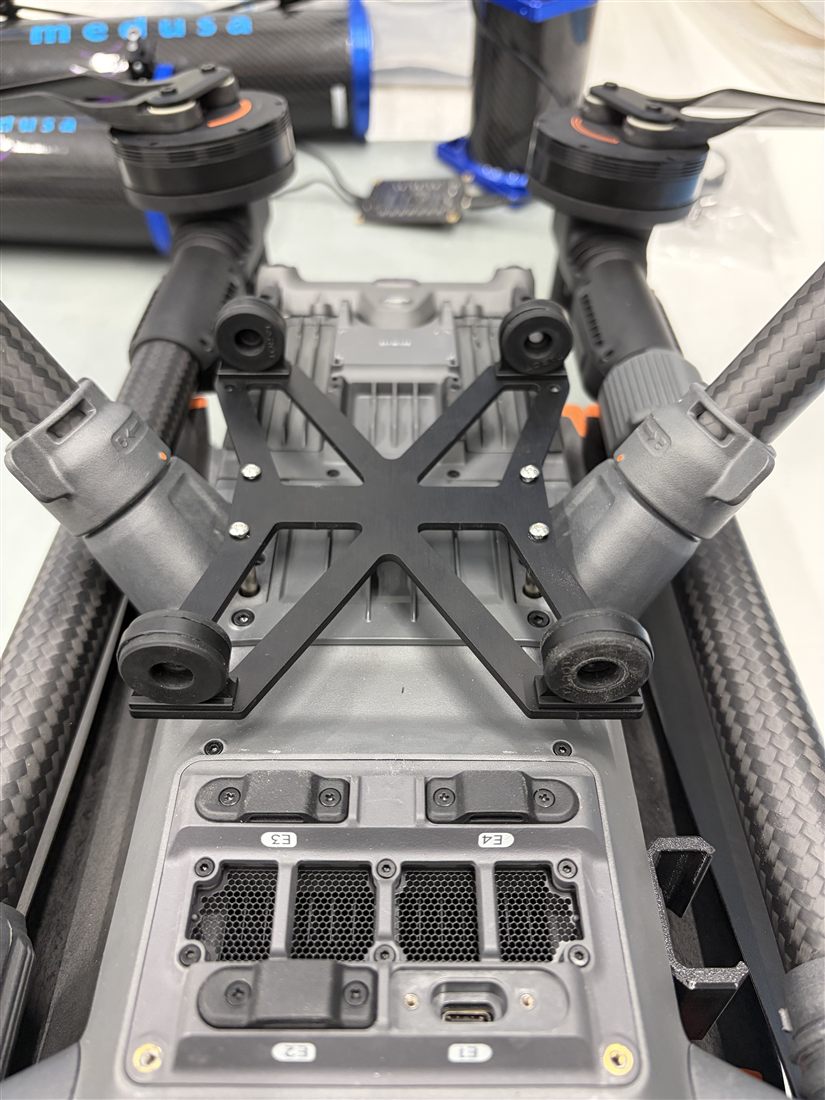
- Place the drone upside down on a protected surface, with sensors shielded from contact.
- Install the M3×16 spacers into the designated mounting holes.
- Position the drone plate on the spacers.
- Insert the M3×25 screws and tighten in a cross (star) pattern for even clamping.
- Insert the carbon-fiber tubes with a twisting motion, keeping extension symmetric on both sides.
DJI Matrice 350
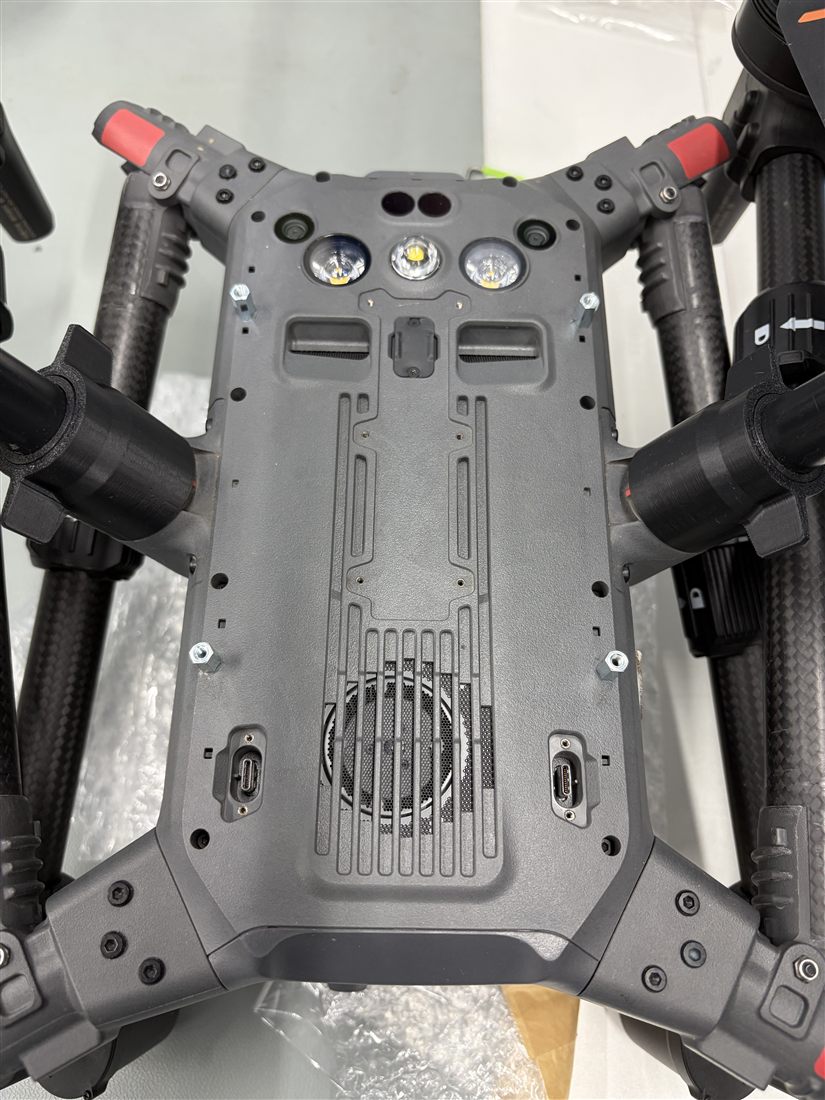
- Place the drone upside down on a soft, protected surface.
- Install the M3×10 standoffs into the mounting holes.
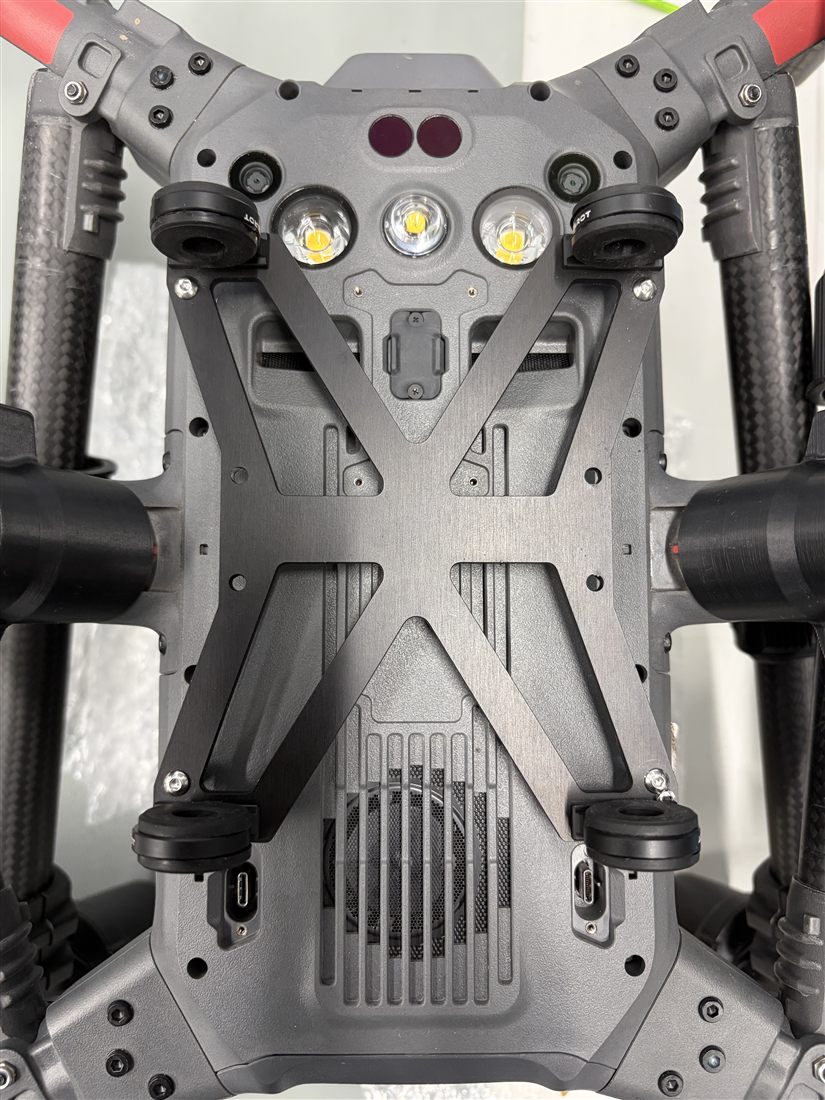
- Position the drone plate on the standoffs.
- Insert and tighten the M3×8 screws in a cross (star) pattern.
- If needed, pre-form a pilot hole in the rubber mounts before inserting fasteners.
- Insert the carbon-fiber tubes with a twisting motion, keeping extension symmetric on both sides.
Other carrier platforms: follow the General steps above and Medusa's official drawings for hole spacing and fastener sizing specific to that platform.
5Sensor-Plate & Detector Mounting
Sensor-plate assembly (Part B)
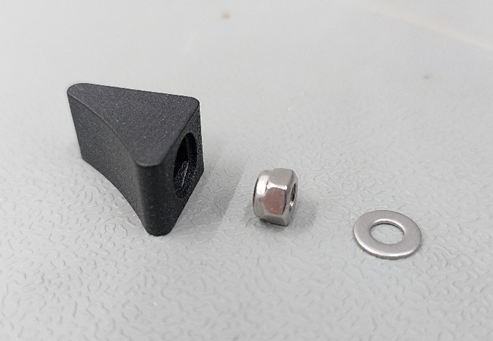
- Insert an M4 lock nut into each corner piece, nut facing downward.
- Place an M4 washer on top of each nut.
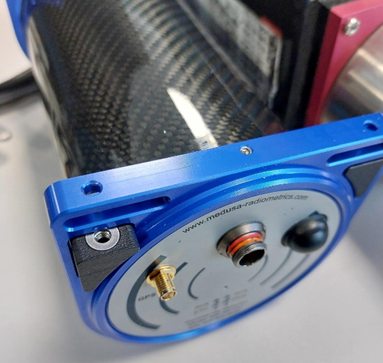
- Insert the corner pieces into the detector's end caps.
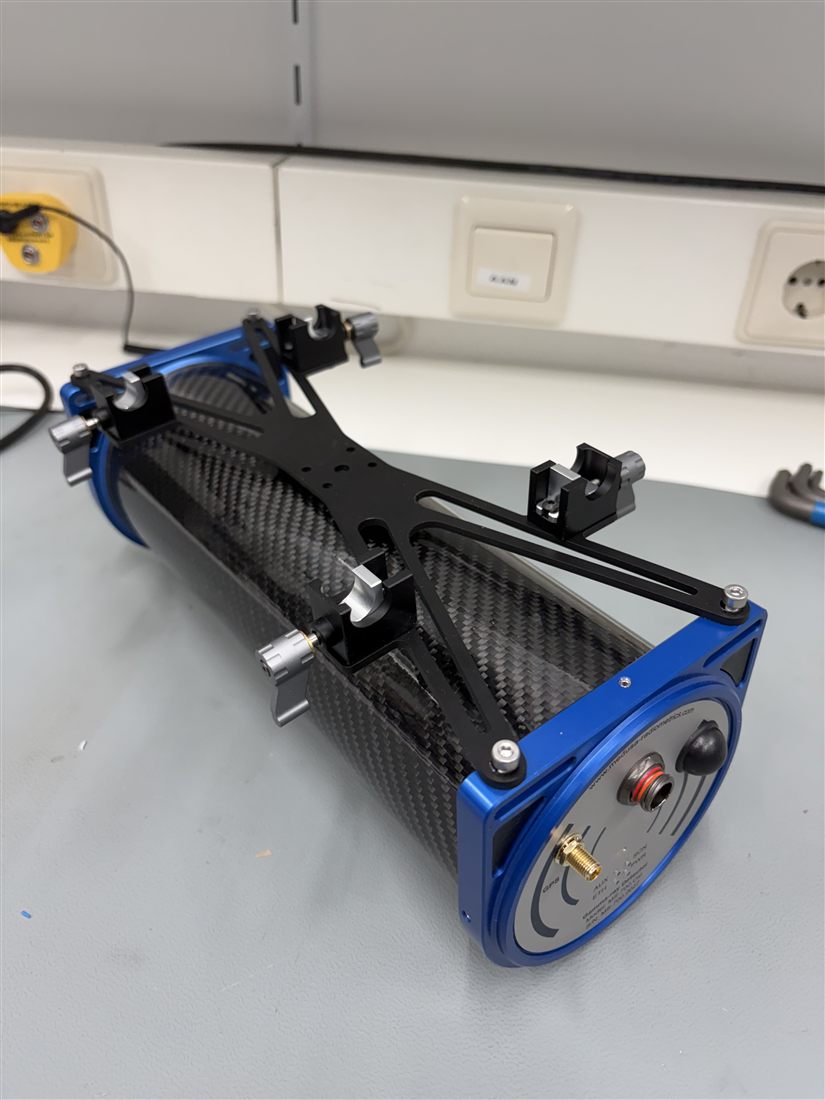
- Position the sensor plate on the detector.
- Secure with M4×20 screws, tightening evenly across all corners.
Mounting the detector to the drone plate
- Loosen all thumb screws (counter-clockwise).
- Align the sensor assembly with the carbon-fiber tubes on the drone plate.
- Press until the coupling clicks into place.
- Tighten all thumb screws (clockwise).
- Verify all four mounting points are secured before proceeding to pre-flight checks.
See Medusa's official assembly instructions for a short video of the mount/dismount procedure.
6Safety Precautions
- Apply thread-locking compound (medium-strength) to all fasteners to prevent loosening from vibration.
- Keep the drone powered off for the entire installation.
- Apply installation force to the mounting system itself, never to the drone frame.
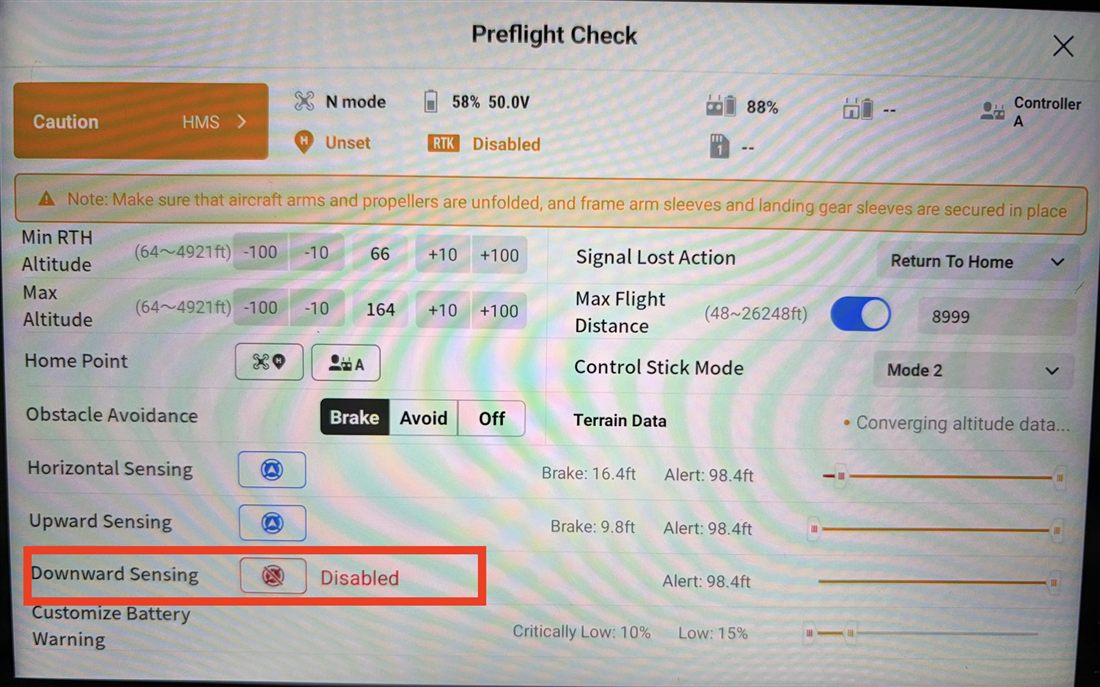
- Disable any downward-facing sensor on the detector before takeoff.
Pre-flight checks
- Verify the mechanical integrity of the full mounting assembly.
- Inspect rubber dampers and fasteners for wear before each flight.
- Confirm downward-facing sensors are disabled via the remote controller.
- Perform a short test flight before a full survey mission.
This section summarizes Medusa's published cautions. Follow Medusa's official assembly instructions for the complete and current safety procedure before every installation and flight.
7Legacy Plates Replaced
The MSB-303 replaces the following model-specific plates, which Medusa has discontinued:
- MS-350 mounting plate (generic)
- MS-350 mounting plate (generic quick-release)
- MS-350 mounting (quick-release, DJI M300/M350)
- MS-700 mounting plate
- MS-700 mounting plate (quick-release)
- MS-700 mounting (quick-release, DJI M400)
- MS-1000 mounting plate
- MS-1000 mounting plate (quick-release)
8Technical Resources
Cited in peer-reviewed research
Independent publications citing this instrument, indexed by Bioz. Citation counts and Bioz Stars ratings are shown live and update as new papers are indexed.